Thursday, June 23, 2016

Sunday, June 19, 2016
Friday, June 17, 2016
Kitchen Glass Splash-Backs
There were installed some time ago, but I have been too busy to post....


These were suppled and installed by A Splash of Glass in Wangara WA
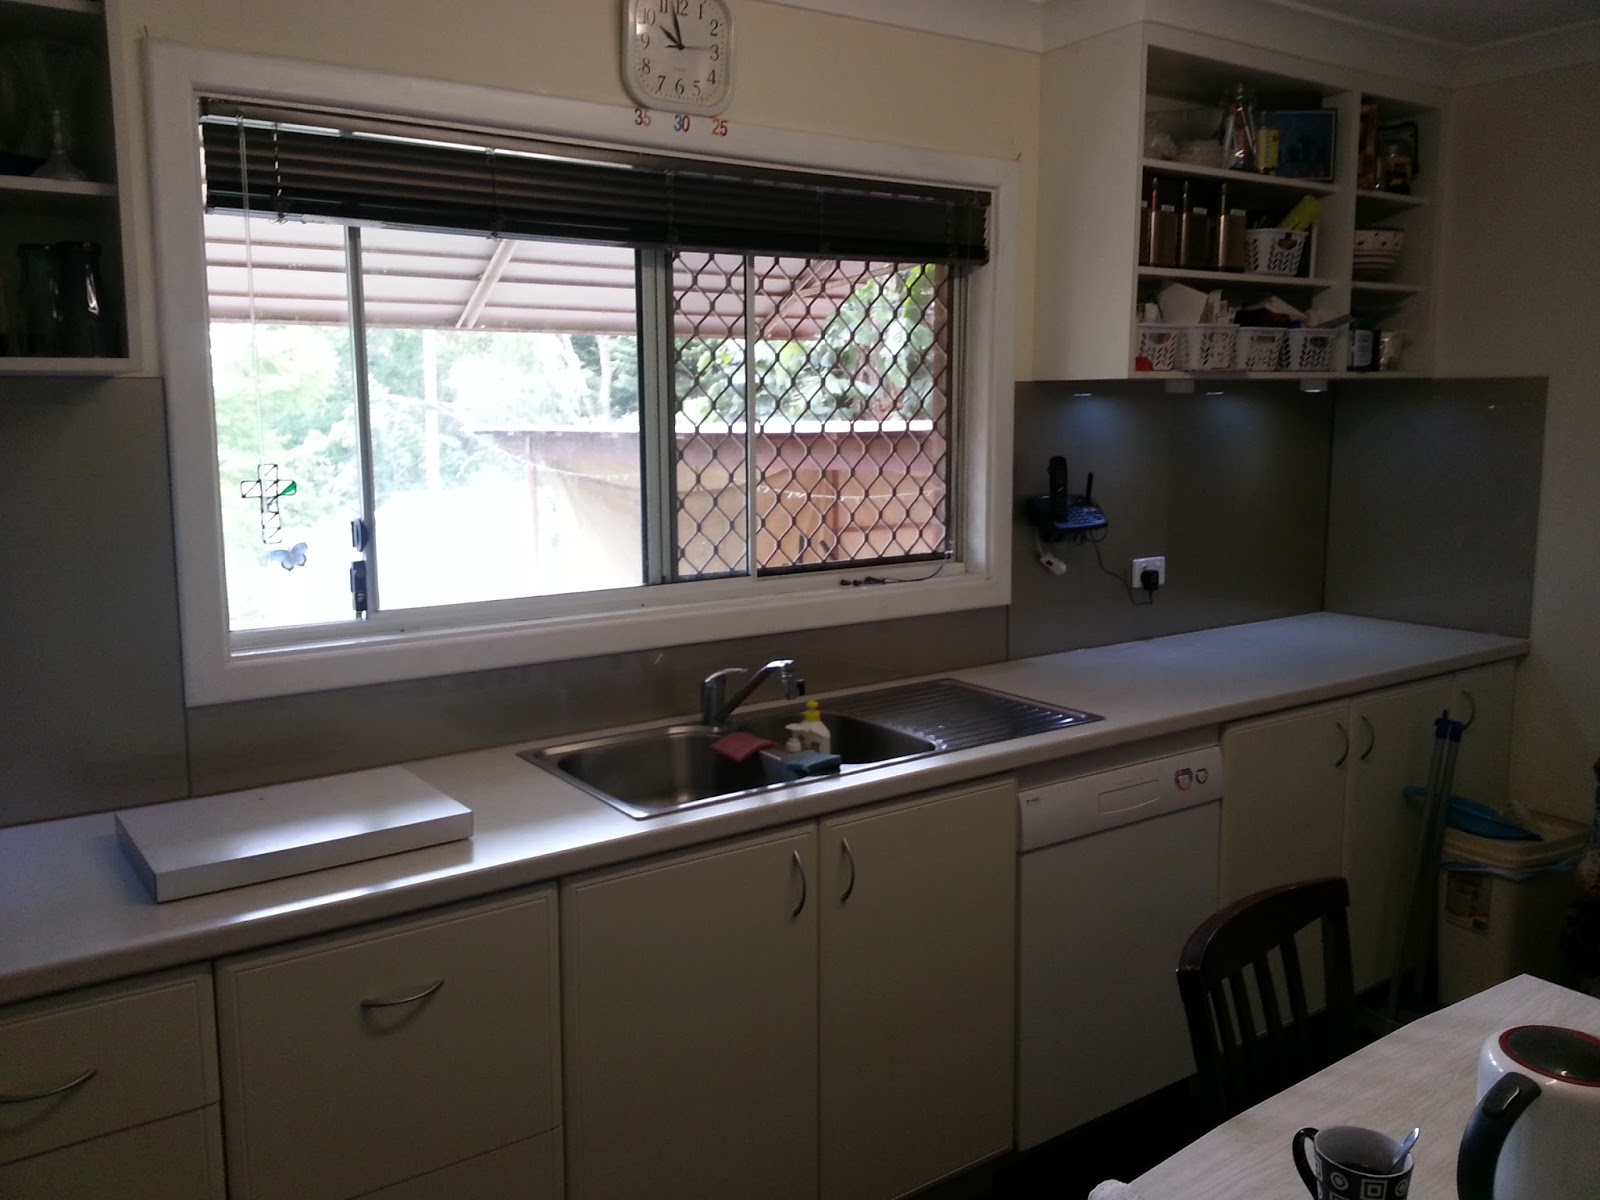

These were suppled and installed by A Splash of Glass in Wangara WA
Thursday, June 16, 2016
Wednesday, June 15, 2016
Kitch Design for my Aunty
Aunty's Kitchen Design Mk1

Another view

Now the hard part, you know... actually start to make this. It's all fun when designing with sketchup but building really brings reality to my delusions :)
Tuesday, June 14, 2016
Chicken Pen from Old Kids Swing-set
Google Sketch-up design of what I would like to do..

Of course it never turns out the way I planned....always seems to be the same with DIY for me...
Photos of the project to follow:
Main Solar Components
Very simplistic diagram of my Caravan System and component list below:

Main Components:
Solar Panel: http://www.ebay.com.au/itm/12V-200W-Solar-Panel-Kit-Home-Generator-Caravan-Camping-Power-Mono-Charging-/331639809484?hash=item4d3745e5cc:g:B1kAAOSwFMZWsDBY
Solar Controller: http://www.ebay.com.au/itm/LCD-30A-12V-24V-Solar-Controller-Regulator-Charge-Battery-Protection-CE-Certify-/251432415596?hash=item3a8a8a316c:g:cw0AAOxy4dNS4O8u
Deep Cycle Battery: http://www.gumtree.com.au/s-ad/armadale/other-parts-accessories/12volt-deep-cycle-gel-batteries/1094753148
** Note: These are all just examples of what to use, of course you will need at least decent 20A 12V wire and other bits and pieces like a fuse panel etc
I have had this system running in my caravan for almost 3 years as of June 2016, it powers an Engel 12v 40Lt Fridge 24/7 and provides lighting and other auxiliary items like powered USB points and a 600watt Inverter. It may be worth noting that I actually have 2 solar panels with a combined 320Watts and 2 Deep Cycle 100AH batteries and this is more than adequate for powering the Engel and lights etc.
Thursday, February 25, 2016


Tuesday, December 22, 2015
Quadcopters
So, along with so many other un-finished projects, I have also began to play around with quad-copters.
I have previously built my own quad-copter frames using wire-screen aluminium as the framework and 1mm aluminium as the plates and fastened together with silicon and rivets. Link to short video on how to build one of these to be added.
 |
| First Quad-copter frame build using aluminium and rivets - 700 mm |
These were somewhat successful and flew very well, however they bent when crashed, and this was a major bummer as I crash a lot!
I have now moved onto using in-expensive frames from eBay in this my learning phase of quad-copter mastery.
I started off with the CC3D flight controller from Openpilot which I found to be excellent, and have moved onto a Flip32 with on-board Barorometer and Compass and External GPS. This is still a work in progress. I have also built a Phantom 2 copy using a shell from Buzz hobbies and a NAZE32 Acro flight controller. This one looks great and flies very well so far.
So this is my DJI 450 copy:
 |
| My DJI F450 Copy from eBay |
More to follow soon.
Slippery Out!
Thursday, November 26, 2015
Back to the Blog
After some time of non-blogging I am back!
Update of current projects:
Kitchen:
Not yet finished, currently getting quotes for splashbacks
Shed:
Finished, full and almost unusable
Fences:
Right hand fence and gate complete!
Left hand fence and gate ordered and should be complete before Christmas! Yaaaa
Caravans:
Uncle's Viscount:
As finished as it is likely to be, usable with working solar power etc
My Millard:
All done, painted, awning installed and working, solar power excellent (running a engel 24/7 for more than a year now), inside needs cleaning but not too bad!
Planning:
After fences we would like to sort out the Patio at the back, and a carport out the front.
We would also like to build a limestone retaining wall instead of the metal fence that currently retains the soil.
After limestone retaining wall with steps is installed a terrace for the grapevine to grow on.
A pool is also on our agenda, but will be a significant cost with all the rock breaking required...
Cheers

 Slippery out!
Update of current projects:
Kitchen:
Not yet finished, currently getting quotes for splashbacks
Shed:
Finished, full and almost unusable
Fences:
Right hand fence and gate complete!
Left hand fence and gate ordered and should be complete before Christmas! Yaaaa
Caravans:
Uncle's Viscount:
As finished as it is likely to be, usable with working solar power etc
My Millard:
All done, painted, awning installed and working, solar power excellent (running a engel 24/7 for more than a year now), inside needs cleaning but not too bad!
Planning:
After fences we would like to sort out the Patio at the back, and a carport out the front.
We would also like to build a limestone retaining wall instead of the metal fence that currently retains the soil.
After limestone retaining wall with steps is installed a terrace for the grapevine to grow on.
A pool is also on our agenda, but will be a significant cost with all the rock breaking required...
Cheers


Friday, July 4, 2014


Thursday, May 22, 2014
Solar Setup
Firstly I fabricated the framework to hold a metal box from SuperCheap that would contain the batteries and controller. This is because there is little room in the van itself. I also incorporated the support framework for the Airconditioner that I was installing into the front window. I then made a control panel out of an old computer case that would hold
the Solar controller and the isolation switch and others.
 | |
| Box for Batteries and Controller |
So from the front box you can monitor the solar output, battery voltage, 12v load current(what you are drawing from the batteries), control all 12v power to the inside of the van, front and back LED flood lights, and battery isolation. I have also installed LED strip lights to the inside of the box lid that will be motion sensor activated for easy night access.


 | |
| Wires from tow hitch to van |
 | |
| Solar Panels insitu |
As a side issue, I have been playing around with different types of LED lights from EBay and found that the surface mount - panel kind of LED light is superior to the bayonet replacement type. The one below is sold to suit a Jayco caravan but I eaisly adapted it to mount inside the existing dome lights in the Viscount.
 |
| LED light for a Jayco from EBAY |
 | |
| LED Bayonet type replacement light for caravans |
 | |
| New side marker lights from EBAY |
 | |
| 2 x 48 LED flat panels - pretty bright! |
 |
| Narva tail lights |
 |
| Narva fuse panel |
Subscribe to:
Posts (Atom)